PhishGuard Reporter Add-in for Office 365
PhishGuard Reporter Add-in for Office 365
This guide will walk you through the steps to install the PhishGuard reporter, and how to view reported emails.
Install PhishGuard Reporter (Single Device Installation)
You can install it using the Outlook Desktop or through Outlook web.
Office 365 through Outlook Desktop
These steps show how to install PhishGuard Reporter add-in for Office 365 through Outlook Desktop:
- Open Outlook desktop application
- Click on the “Get Add-ins” button which is located in the tool bar

3. In the Add-Ins windows, click “+ Add a custom add-in” button

For English URL: https://phishguard.sa/static/plugin/dist/manifest.xml
For Arabic URL: https://phishguard.sa/static/plugin-ar/dist/manifest.xml

5. A warning may pop up , press Install.

6. PhishGuard Reporter has been installed successfully

Office 365 through Outlook Web
These steps show how to properly install PhishGuard Reporter add-in for Office 365 through Outlook Web:
- Go to outlook.office.com
- Choose and open an email
- Click on the three dots
 located in the top right
 - Press “Get Add-ins” which is located in the button of the menu

5. In the Add-Ins for Outlook windows, click “+ Add a custom add-in” button

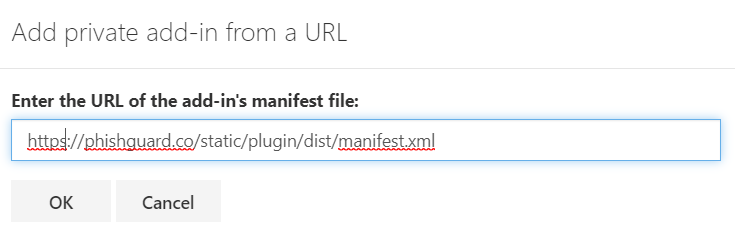
6. Enter the following URL of the manifest file in the field then press OK
URL: https://phishguard.sa/static/plugin/dist/manifest.xml
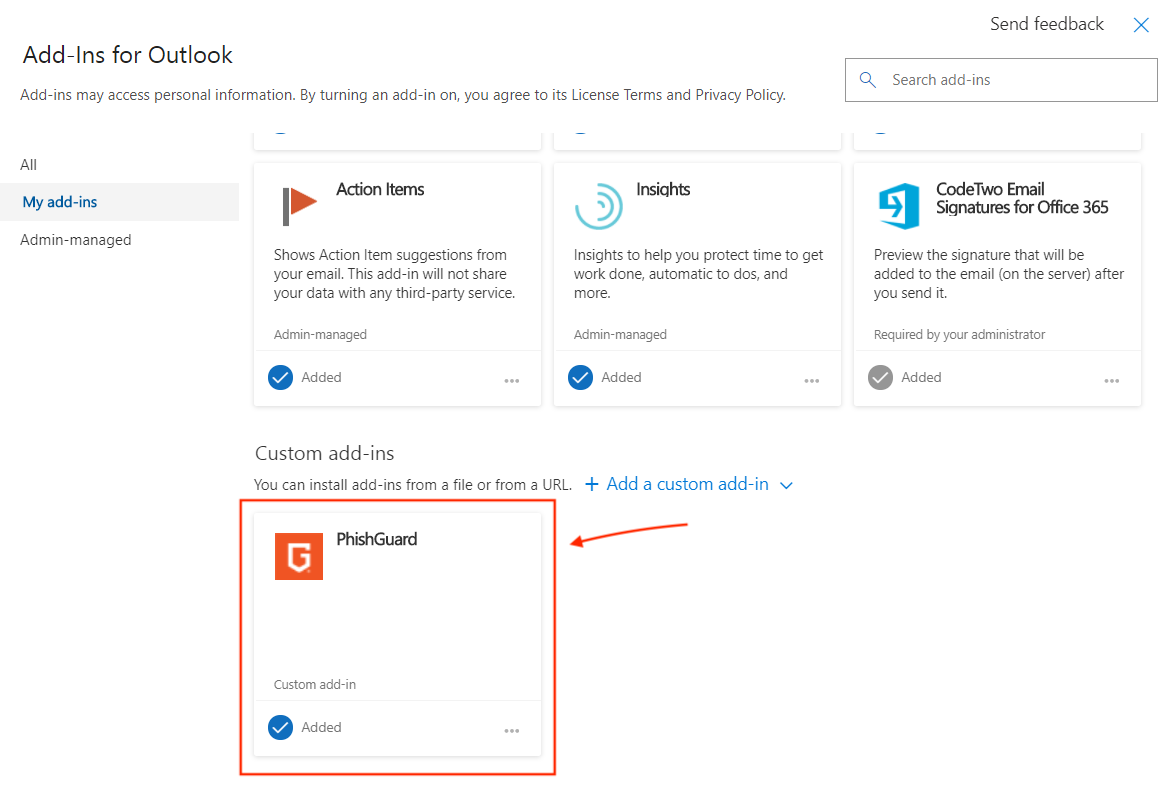
7.A warning may pop up, press Install
8. PhishGuard Reporter has been installed successfully
Install PhishGuard Reporter (Centralized Deployment)
These steps show how to properly install PhishGuard Reporter add-in:
- Sign in to Microsoft 365 with your work or education account.
- Select the app launcher icon in the upper-left and choose Admin.
- In the navigation menu, press Show more, then choose Settings > Services & add-ins.
- If you see a message on the top of the page announcing the new Microsoft 365 admin center, choose the message to go to the Admin Center Preview (see About the Microsoft 365 admin center).
- Choose Deploy Add-In at the top of the page.
- Choose Next after reviewing the requirements.
- Choose the following option on the Centralized Deployment page:
- I have a URL for the manifest file. For this option, type the manifest's URL in the field provided.

9. If When finished, choose Deploy. This process may take up to three minutes. Then, finish the walkthrough by pressing Next. You now see your add-in along with other apps in Office 365.
Report Phishing Emails
- Open Outlook
- Open the message
- Click on “Report Phishing” button and a panel from the right side will be displayed

4. Click on the “Report Phishing” link

5. It will show a check mark ✓ which indicates successful reporting

Below steps are used to how to report a phishing email in Outlook Web:
- Open Outlook
- Open the message
- Click on the three dots
 located in the top right
 - Press on “PhishGuard” which is located in the button of the menu and a panel from the right side will be displayed

- Click on the “Report Phishing” link

- It will show a check mark ✓ which indicates successful reporting

View Reported Phishing Email
Below steps are used to how to view reported phishing emails:
- Go to PhishGuard
- Login with your account details
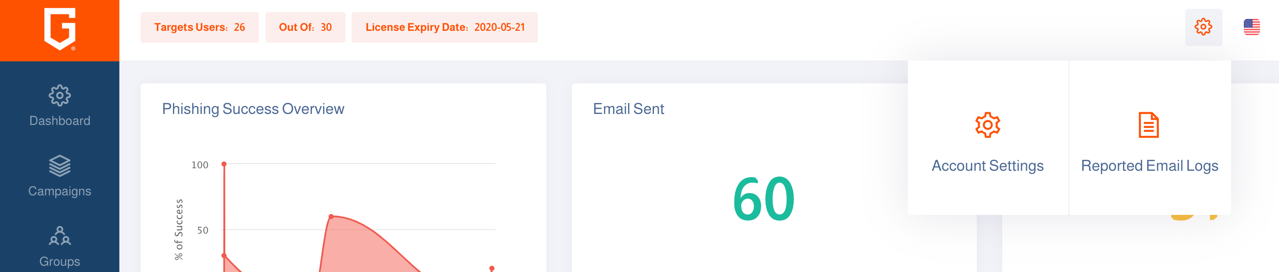
- Click on the gear icon
 on the top left and a pop up will be displayed
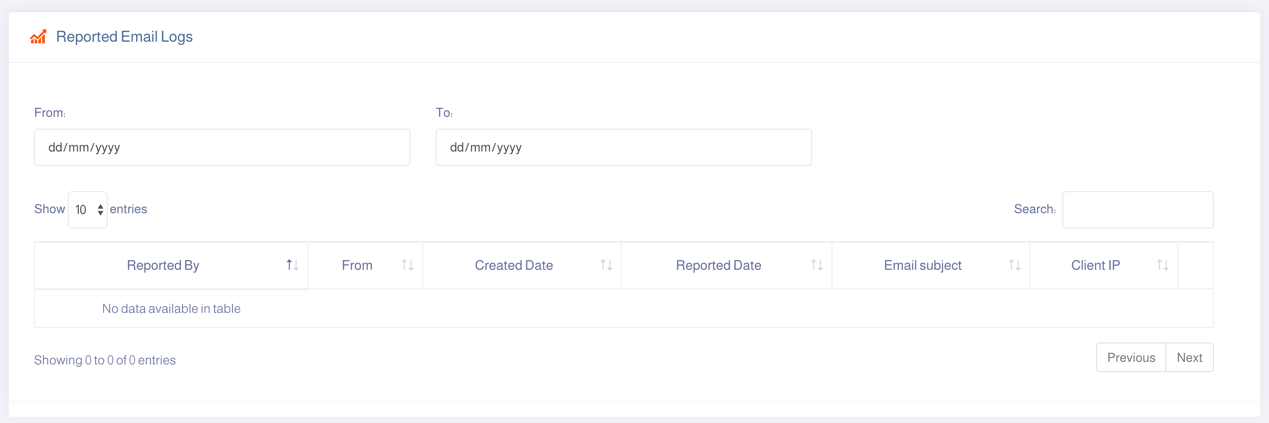
 - Click on “Reported Email Logs” to view all reported emails which was not simulated from PhishGuard
5. You can search based on from and to dates for all reported emails log
Enable Email Notification
- Login with your account details
- Click on the gear icon
 on the top left and a pop up will be displayed
 - Click on “Account Settings”

5. Navigate to “Notification Settings”
6.Add the administrator email and enable by click on the button to enable it
That’s it; you have just successfully installed and configured PhishGuard Reporter Add-In!
Related Articles
PhishGuard Reporter Add-in for Outlook 2016 – 2013 (Single Device Installation)
PhishGuard Reporter Add-in for Outlook 2016 – 2013 (Single Device Installation) We will walk you through the steps to install the PhishGuard reporter, and then how to view the reported emails. In this article, we will discuss: Install PhishGuard ...Add PhishGuard to Your Sender Policy Framework (SPF) Record
Add PhishGuard to Your Sender Policy Framework (SPF) Record A Sender Policy Framework (SPF) record is a list of mail servers and domains that are authorized to send emails on your behalf. Adding PhishGuard to your SPF record allows us to send ...Add New Group
Add New Group Having a group of targets created is one of the essential steps prior launching your campaign. Login using your username and the associated password. From the side menu, select Groups. Click New Group button [1]. Enter a unique group ...Whitelisting PhishGuard in SonicWall
Whitelisting PhishGuard In SonicWall Allowing emails coming in from PhishGuard list of IPs in SonicWall services will allow phishing targets to receive phishing emails if they are added in a phishing campaign. This is possible in SonicWall by adding ...Whitelisting PhishGuard in Sophos
The following instructions are meant to help you whitelist the PhishGuard domains and IPs. Sophos Email Appliance (SEA) Whitelisting in your Sophos Email Appliance (SEA) will allow your users to receive phishing emails from PhishGuard. Modify the ...