Azure AD Integration - Fetch Users
Integrating Azure AD with PhishGuard
Integrating Azure Active Directory (Azure AD) with PhishGuard enables seamless user management and enhances security awareness training. This knowledge base article provides detailed instructions on how to register an app in Azure AD, configure permissions, create a client secret, and set up PhishGuard to fetch users from Azure AD.
Prerequisites:
Before proceeding with the integration, ensure that:
- Your Azure account has permissions to manage applications in Azure Active Directory.
- You have one of the following Azure AD roles with the required permissions: Application administrator, Application developer, Cloud application administrator.
Steps to Register an App:
- Sign in to the Azure Portal.
- Navigate to Azure Active Directory.
- Under "Manage," select "App Registration" > "New registration."
- Enter a display name for your app and click "Register."

After the registration process is complete, the app overview pane will be displayed.
Granting Required Permissions:
- Click on "API permissions" > "Add a permission" > "Microsoft Graph" > "Application permissions" > "User.Read.All" > "Add Permissions."
- Grant admin consent for the organization.

After granting the required permissions, proceed to create a client secret.
Creating a Client Secret:
- Select "Certificates & secrets" > "New client secret".
- Add a description for the client secret and click "Save".

PhishGuard Configurations:
After registering the app, granting required permissions, and creating a client secret, follow these steps to configure PhishGuard:
- Add your Tenant ID, Client ID, and Client secret to Azure Fetch Users App settings

- Navigate to "Groups" > "New Group" > Choose "Azure AD" and click on "Import targets from Azure AD" and users data should be imported.

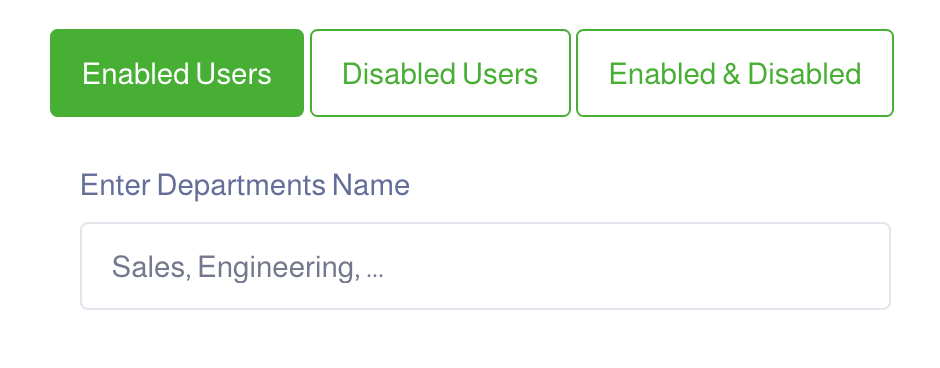
- Optional Filtering: When importing from Azure AD, you can filter users based on their status (enabled or disabled) and department.
By following these steps, you can seamlessly integrate Azure AD with PhishGuard, allowing for efficient user management and targeted security awareness training.
Related Articles
Azure AD Integration - Delete Reported Email
Azure AD Integration To integrate with Azure AD, you will need to register an app. Prerequisite: The Azure account must have permission to manage applications in Azure Active Directory (Azure AD). Any of the following Azure AD roles include the ...Add New Group
Add New Group Having a group of targets created is one of the essential steps prior launching your campaign. Login using your username and the associated password. From the side menu, select Groups. Click New Group button [1]. Enter a unique group ...Third-Party Logo Usage in PhishGuard Templates
Balancing Realism and Compliance: Why We Use Real Brands in Phishing Simulations One of the most common questions we receive from organizations using PhishGuard to build their security awareness programs is: "Is it legal to use the logos of real ...Manage Existing Groups
You may need to edit or delete a group of targets. Login using your username and the associated password. From the side menu, select Groups. You will see a list of all the existing groups. Select one of the options discussed in this article to manage ...Performance Metrics
Performance Metrics PhishGuard was tested to handle large records based on a high-level testing approach. So the below sections should be taken under considerations when you launch your campaigns. Load Model Transaction Duration Transactions per hour ...